Are you sure that the older layers are caulk and not grout? If it’s actually grout, you can use a chisel to gently break it up.
this post was submitted on 08 Jan 2024
25 points (100.0% liked)
Do It Yourself
7675 readers
1 users here now
Make it, Fix it, Renovate it, Rehabilitate it - as long as you’ve done some part of it yourself, share!
Especially for gardening related or specific do-it-yourself projects, see also the Nature and Gardening community. For more creative-minded projects, see also the Creative community.
This community's icon was made by Aaron Schneider, under the CC-BY-NC-SA 4.0 license.
founded 2 years ago
MODERATORS
Should have mentioned the surround is plastic and the front glass is trimmed in brass. Nothing I would expect grout to be used on.
Fair, but that doesn’t mean it wasn’t. Some people do weird things. :)
lol, true. The original remodel was done in '97, which is when I think the deepest layer is from. Who the fuck knows what they did.
Indeed. Good luck in any case. :D
Removing caulk sucks.
The best tool for the job is a razor blade / utility knife, and a pack of replacement blades. Blades are dirt cheap, don’t be afraid to bend them / abuse them.
Afraid I can't offer any tricks, and unfortunately I will be doing this task myself soon. However one thing that concerns me about you seeing leaks is that if there is a full pan in the bottom, that pan should have a lip on it that goes up behind (and higher than) the edge of the tile. This means any water at the height of the caulk should not be causing a leak. Is it possible that the mess of caulking you are seeing is due to a previous owner attempting to cover over actual holes in the pan?
I had a plumber out to look at my basement shower right before Christmas. The drain was backing up and we couldn't get it to clear, but even when running the water slowly (nothing appearing to come back up the drain) I was seeing water running out onto the floor after a couple minutes. Well it turns out there is supposed to be a seal between the drain pipe and the larger pipe that drops down from the pan. My seal was completely missing so the water was running onto the packed earth under my cement floor and then backing up underneath the shower pan. He told me I could seal this with silicone and this has been working just fine so far, but I've also found rubber seals I can buy to hammer into place for a more permanent seal next time it fails. Not sure if any of this helps with your situation, but I figure good knowledge should be passed around!
Fortunately I know where the leak was coming from. It is where the surround meets the glass front and pan. The surround is plastic, not tile, and was clearly leaking from the corner.
Best of luck to you then!
I did think of one thing I've seen at the hardware store... they make a tool with a triangular tip, which I believe was for removing caulking from corners. You might take a look for one of those?
I have a plastic version, and it was great until it was no longer sharp. I'll be picking up the one posted by JimmyBigSausage. Seems pretty versatile
If the caulk is still maleable, can it be carefully cut out with a utility knife? -Not scratching any tile, wall or floor surfaces.
The top layers are, but the stuff underneath is pretty hard. Comes off in chunks and seems pretty dry. I have managed to get a lot of it out, but the last bit is stubborn as hell.
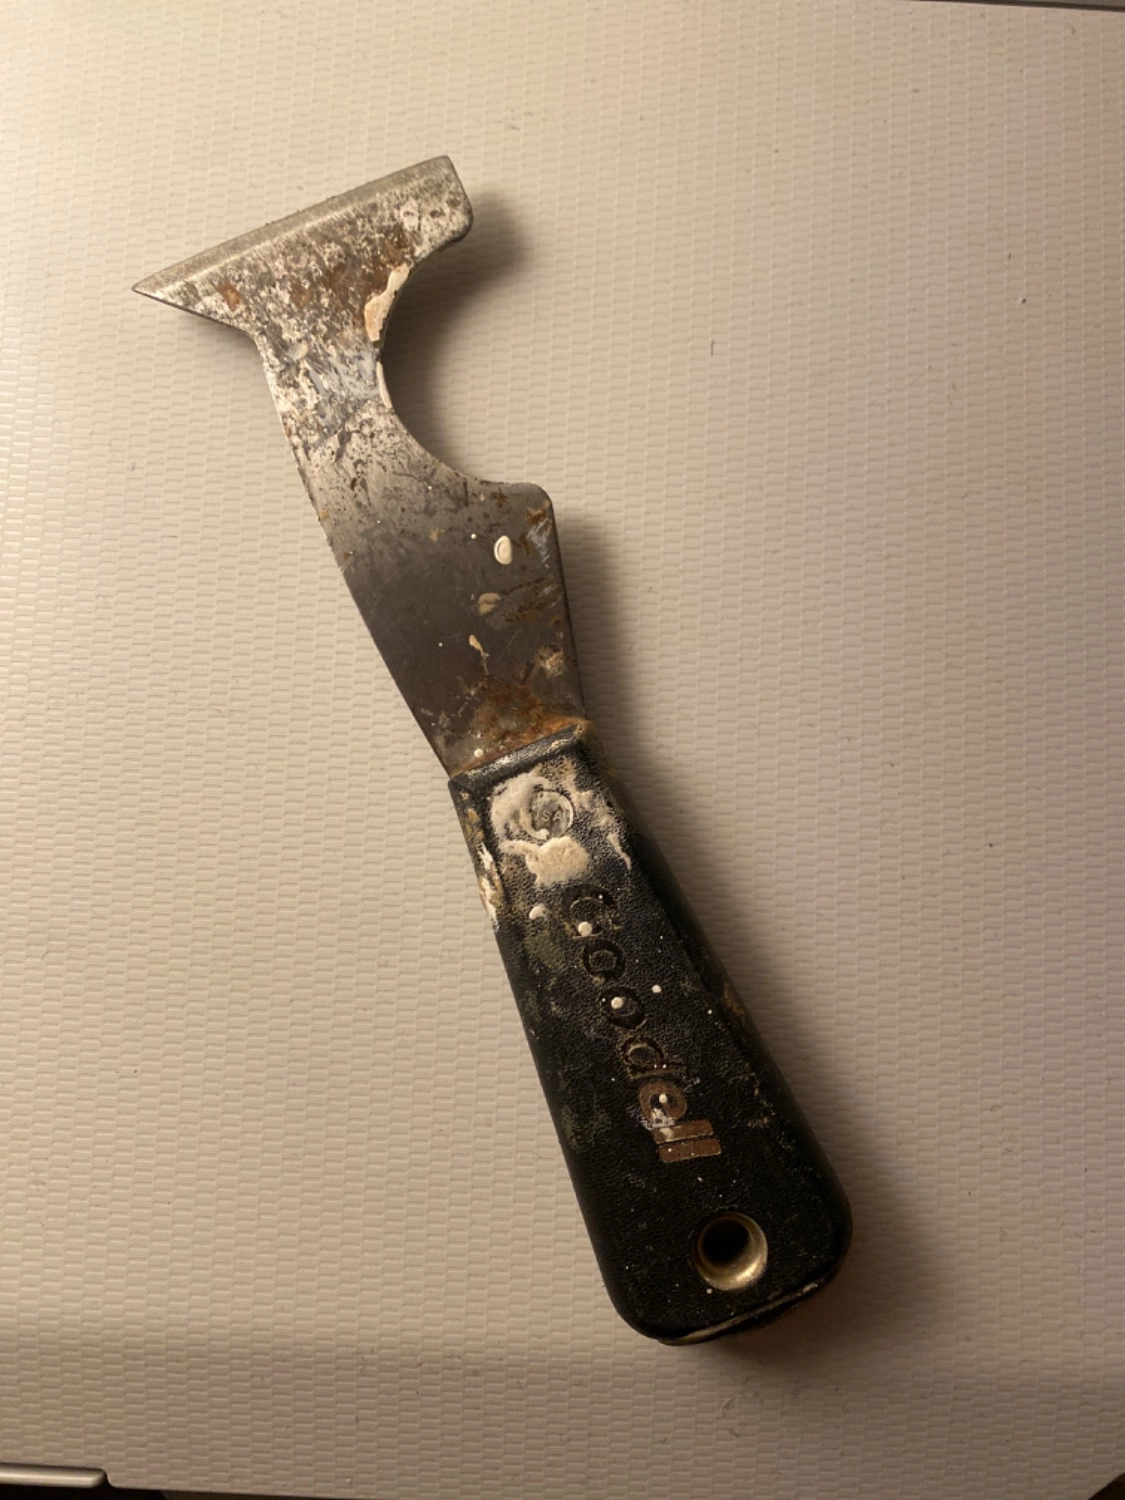
Actually that helps a lot. I have a shitty plastic scraper and just a basic metal one. That shape would probably do a lot of good.
What's under the caulk? If it's ceramic tile, you can probably get away with a brass cup brush in a drill. Test in an inconspicuous area first obviously, but it should be less likely to scuff up the surface as something like scotchbrite.
It is a plastic surrounding, but nothing I would care about cosmetic damage.
Brass brush on a drill would probably melt into plastic fast. But a handheld one would work ok, or steel if you need more persuasion and aren't worried about scratches.
If you've got a heat gun, a moderate amount of heat for 30 seconds or so can help. Just go easy on the heat if you've already applied a chemical remover, don't want to gas yourself.
Oh, good to know, I do have a heat gun